Soft light layer in Photoshop

Here’s a nice little trick I learned to improve the contrast and saturation of images in Photoshop, without having to spend too much time messing around with levels or curves:

  1. Open the original image
  2. Create a duplicate layer (hit command-J on a Mac)
  3. Right click on the new layer, in the layers tab
  4. Select ‘blending options’
  5. Under ‘blend mode’ choose ‘soft light’

The effect can be weakened or strengthened by adjusting the opacity of the layer. If you want to push it beyond 100%, just make another copy of the original layer and blend it in as above.

With portraits, this trick can make people look a bit red. If so, adjust the hue and saturation by selecting Adjustments >> Hue/Saturation. Then, edit ‘Reds’ by dragging the slider over a bit to include oranges, then reduce the level of saturation.

A video explanation of all this is online.

More camera and travel issues

Earlier today, I got my Rebel XS back from Canon. Apparently, they had to replace one of the circuit boards to deal with the infinite loop the camera got itself into at the Fill the Hill event. Unfortunately, whoever did the repair managed to disable my on-camera flash in the process. I had little choice but to send it back to Canon immediately, since my one-year warranty will be up in a few days.

Henry’s says they will definitely lend me a body for the family reunion in Vermont, since I bought their three-year extended service plan. I just have to hope I get the camera back before December 19th, when I will be leaving for Vancouver. I really doubt Henry’s would lend me a body for a whole month, but it would be really intolerable to be sans-dSLR during my first trip to Vancouver in two years. I am told that ‘re-repairs’ are generally faster than ordinary repairs. That’s a bit comforting, though it is unnerving to know that cameras are broken often enough during the repair process for the Henry’s staff to be familiar with the statistics. What ever happened to quality control?

As for the mode of travel, I am leaning warily towards the bus. It’s a lot faster and cheaper than the train, and 1/5 of the emissions of flying. On the ‘sociology of travel‘ side, nothing shows commitment to climate change mitigation more than extending the length of your journey twelve-fold, in order to decrease the associated emissions by 80%. Well, I suppose the only thing that would would be avoiding the journey entirely, and passing the time blockading nearby coal power plants instead.

The Rebel XS and the 20D

Heron in Dow's Lake, Ottawa

Unfortunately, my year-old Canon Rebel XS suffered some kind of failure on Saturday: constantly reading ‘busy’ in the heads-up display and being unable to take photos. Henry’s is sending it back to Canon for repair, and estimate it will be away 4-6 weeks. Quite kindly, when they heard that I was planning to take photos for the Fill the Hill event, they lent me a 20D for the weekend.

The 20D is an older camera positioned at a higher level than the Rebel XS. It is larger and sturdier, and feels more substantial. It also feels more balanced with heavy lenses like my 70-200. Two things I really like about it are the shutter release sound (which seems a lot more pleasing and professional than the Rebel XS) and the intangible sense that this camera is always eager to take photos. Pressing the shutter feels like allowing it to follow through with a restrained urge. Part of that feeling may come from the absurdly fast burst shooting speed.

I do have some complaints about the 20D. Some of the controls are very confusing. For instance, the on-off switch has three positions. In one ‘on’ mode, you can use the rear control wheel for exposure correction, once you have half-depressed the shutter button. Nobody would ever guess that, and I spent a good 20 minutes trying to figure out how to undo the -1/3 correction I accidentally applied (I eventually got it back to 0 by switching from 1/3 stop increments to 1/2 stop). The screen is much smaller and less useful than the one on the Rebel XS, so it isn’t really all that useful for reviewing images in the field. Also, the processor is slower, meaning that photos take longer to download.

All told, I now have a better understanding of why people buy Canon’s $1000ish cameras, when their features are mostly the same as those in their $500ish cameras. The 20D certainly looks and feels more professional than the Rebel XS. That being said, I think I will stick with my plan of saving up and eventually buying a dSLR in the much more costly category of those with full-frame sensors.

P.S. With my Rebel XS away, it may be tough to produce nice photos of the day for the next month or so. I went out and took a heap of fall photos today, to try to see me through the dry spell. If I do end up going to a family reunion in Vermont in November, I will probably rent a dSLR (and maybe the 24-70 f/2.8L lens) for the duration.

P.P.S. One other lesson from all this is that megapixels really don’t matter. Which has more, the Rebel XS or the 20D? I don’t know, and it doesn’t matter in the slightest.

[Update: 14 November 2009] The Rebel XS came back from Canon with a new flaw introduced.

[Update: 14 June 2010] Recently, the electrical system on the Rebel XS failed again. Rather than get a replacement under the Henry’s service plan, I got credit towards a 5D Mark II.

Keep your flash in your pants

Colourful metal dots

The other day, I attended some live music at the Umi Cafe on Somerset. Throughout the multi-hour performance, there was a cadre of amateur photographers – some with point and shoot cameras, some with dSLRs – happily snapping away. Almost without exception, every shot was accompanied by a bright white flash. There are two major reasons why photographers should avoid this pattern of behaviour.

Firstly, it produces ugly and unnatural pictures. Using a flash is akin to looking at a scene with a bright white miner’s lamp on your head. This is problematic for several reasons: (a) it lights close things much more than far ones, leading to blinding white foreground objects and black backgrounds; (b) it throws very harsh shadows, leaving a person’s nose looking like a mountain on the moon; (c) the light from the flash is a different colour from incandescent or fluorescent lighting, making the scene look oddly discordant in colour.

Secondly, it really annoys people. While the ‘stadium full of flashes’ effect is a Hollywood cliché, the actual impact of using lots of flashes – especially in a small and intimate environment – is to impose your weird lighting preferences on an entire room full of people, many times a night. Flashes are distracting and rude, and should only be deployed when really necessary.

There are easy ways to avoid using the flash. First and foremost, don’t use your camera in full auto mode. With no guidance, it will usually decide that the pop-up flash is the safest way to get a usable photo. With just a bit of thinking, you can usually do better.

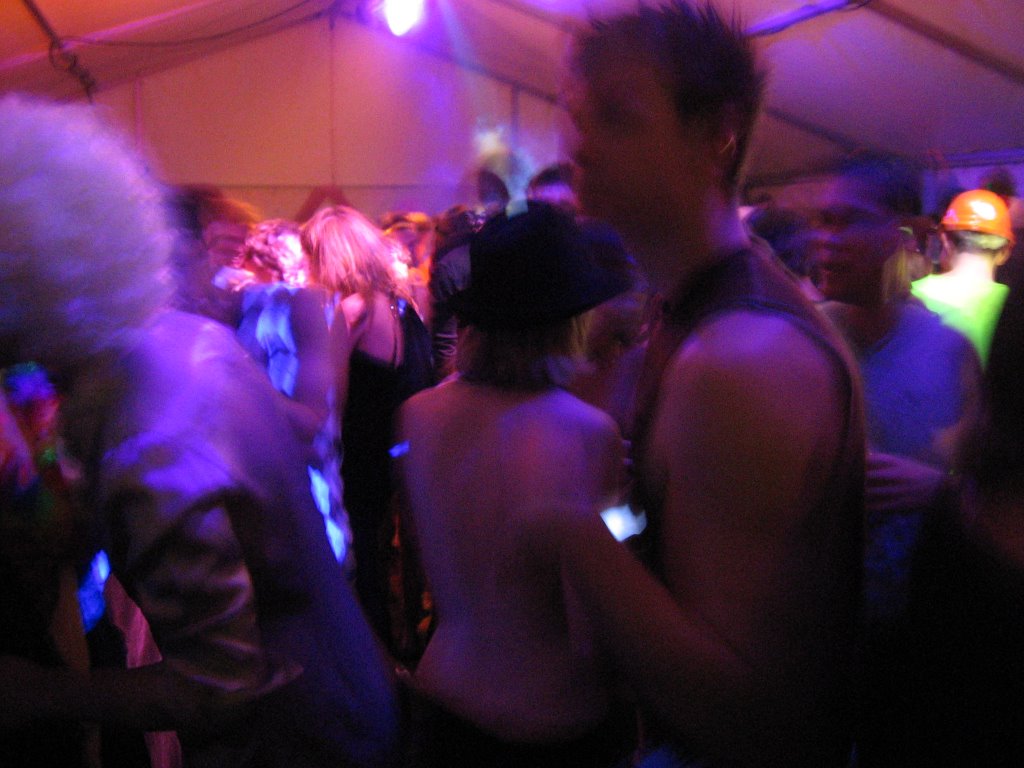
The first way is to increase the ISO setting on your camera. This basically makes it more sensitive to light. While doing so will make your pictures grainier, they will look a lot more natural than ‘headlamp effect’ flash shots. If you don’t know how to do this, check your manual or search online. With most point and shoot cameras, and all dSLRs, it is a fairly simple procedure. Many cameras even have a dedicated button for it. On a point and shoot camera, try cranking it up to 400 or so. On a dSLR, don’t feel shy about using 1600 ISO, or even faster. Here is an example of a high ISO photo taken with a cheap P&S camera. A flash photo of the same scene would have been infinitely worse.

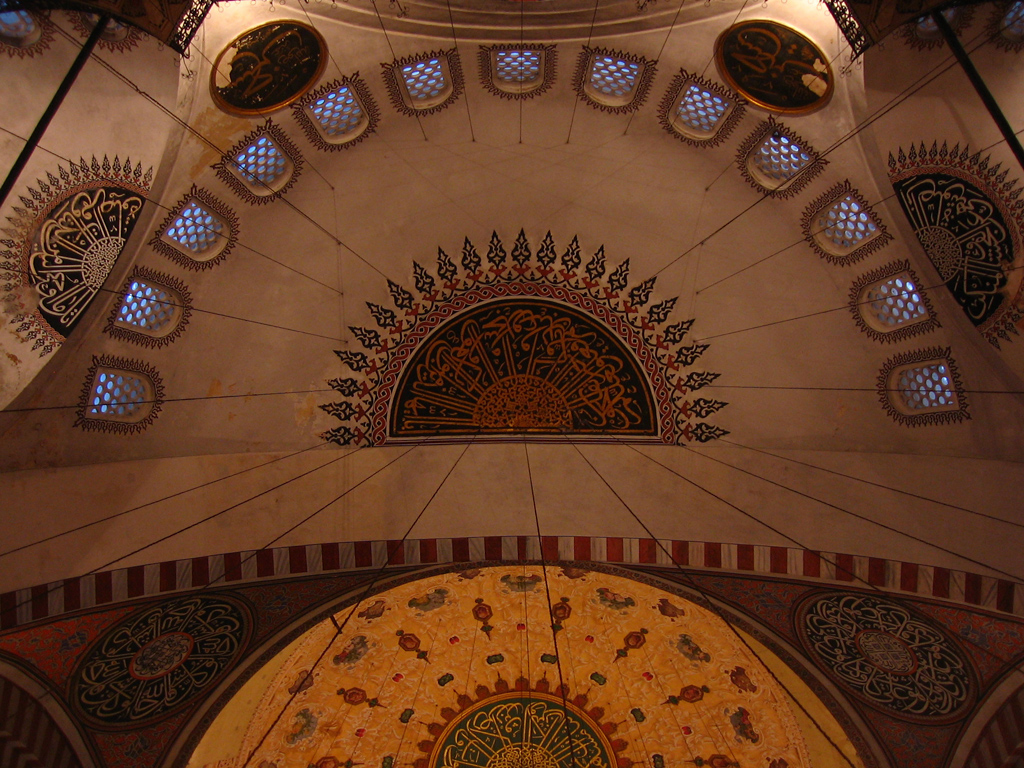
The second way is to brace your camera somehow. If you have a two-second timer, this can be easily achived. Just frame the shot, with the camera sitting on the edge of a table, wall, or solid object. Then, press the shutter and then leave the camera still to take a photo. Anything moving will probably show some motion blur, but you are once again likely to produce a nicer and more natural image than you would with a flash. Tripods are also an excellent idea, and there are tiny little tabletop ones that can be easily carried around and used with a point and shoot camera. I used the combination of a $180 Canon P&S camera and a $5 tripod to take these photos: Montreal, Ottawa, Morocco, Paris, Istanbul. A great trick for churches and other buildings with interesting ceilings is to put your camera flat on the ground with a timer set, press the shutter, and step back. I used that trick to take these: Oxford, Istanbul.

People think about photographs as something you ‘take’ by pointing a camera at something and pressing the shutter. In fact, it makes more sense to think about photos as something you ‘make’ using a combination of light, gear, and intelligence. By putting some thought and effort into things, you can produce more natural photos in intimate settings, without temporarily blinding and annoying everyone around you.

Photo show opening party

Astronaut Love Triangle introduction

Last night’s photo show launch was well attended and great fun. My thanks again to the ever-talented Andrea Simms-Karp as well as the highly comic and deservedly infamous Astronaut Love Triangle (with introductory note above). Their repertoire included songs about cyberstalking, the side effects of the modern pharmacological rainbow, and the tenacity of the large American automobile, in the face of environmental concerns. At least one audience member seemed to be merrily recording video, so the performance has the potential to end up online somewhere.

Thanks again to everyone who attended and participated.

My photos will be on the walls at Raw Sugar (692 Somerset) for the duration of the month, with the 12×16″ prints going for $60 and the 12×18″ prints going for $70.

As of last night, we also have a winner for the print-for-comments contest. He will be receiving a copy of this image of the ceiling of Exeter College Chapel, should he so desire.

[Update: 6 September 2009] Zoom has also written about the vernissage. The Astronaut Love Triangle blog also gives it a mention.

[Update: 7 September 2009] The Elgin Street Muse also wrote about the opening.

[Update: 11 September 2009] The opening was also covered on tales from a grouch.

[Update: 23 September 2009] Until the end of the show, all the prints are on sale for $50.

[Update: 1 October 2009] Some videos of the Astronaut Love Triangle performance are now online: Avatar Love and Side Effects. They can also be seen directly on Vimeo: AL, SE.

Building a camera system

Woman with flowers in her hair

I often get asked about what sort of photographic gear serious amateurs should buy. Normally, I direct them towards this excellent primer on building a digital SLR system, written by Philip Greenspun. It is, however, a bit on the long side. Here is a briefer encapsulation.

Brand

I would go with Canon or Nikon. This is mainly due to compatibility, both across a wide range of accessories (lenses, flashes, etc) and across long spans of time. Both companies make excellent gear that will be usable for decades. I happened to go with Canon and have always been happy with them.

There are other brands that have advantages (both in terms of price and features), but the market for Canon and Nikon related gear is broad and deep.

Sequence

This really depends on what sort of photography interests you most. Someone seriously into nature photography would skew their purchases towards telephoto gear, while someone looking to take informal shots in casual settings might go for fast primes. The basic sequence, however, looks something like this:

  1. Get a crop-sensor dSLR. These cost about $600-700 and are very capable cameras. One thing to remember, though, is that they will multiply the effective focal length of all your lenses by 1.6. As such, a 50mm lens on a crop sensor is akin to an 80mm lens on a film body or full-frame dSLR.
  2. Get a memory card, but don’t worry about filters and things unless you are going to be working in very wet or dusty places.
  3. Get a couple of batteries. You don’t want to find yourself in the middle of an excellent and unexpected photo session, but unable to snap any more shots.
  4. Buy the kit lens. It won’t be of great quality, but they are usually very cheap when bought with the camera body. They are also often the only way to get cheap wide angle capability for a dSLR.
  5. Buy a 50mm f/1.8 lens. These have great optical quality, can allow fast shutter speeds in dark circumstances, and can often be purchased for about $100. A 28mm or 35mm lens would more closely approximate a 50mm ‘normal’ lens on a film camera, but these tend to cost a lot more.
  6. Get a tripod. It’s not necessary for absolutely every kind of photography, but it is useful for most. It is also a good way to keep your camera stored in an accessible and highly visible place (which prompts me, at least, to go out shooting more often).
  7. Get a camera bag that works for you. This is a tricky process that usually takes some experimentation. You want something big enough to carry what you need, but not so big you can never take it anywhere. You also need to decide whether you prefer a shoulder bag (much more accessible), a backpack (more comfortable), or something else. When carrying around just one camera and lens, don’t bother with a camera bag. Just bring a plastic bag in case of rain. Having your camera stuffed a way in a bag when walking around will make you miss photos. Bags are for carrying extra gear, and providing protection in transit.

Beyond this, the sequence really depends on what you plan to shoot. Some people might start with flash(es), some people might save their pennies for professional grade zoom lenses. Others might improve on their kit lens with consumer grade zooms (such as the reasonably high quality lenses that zoom from around 30mm to around 100mm and are available for under $500). Some people might assemble a collection of primes. Some people might save up to go straight to a full-frame body.

As someone who has tried a fair sampling of different kinds of photography, I would suggest that the following is a reasonable sequence:

  1. Consumer grade zoom (about 30mm to 100mm)
  2. Portable reflector (for portraits in sun)
  3. External flash and method for triggering it off-camera (either a cable or radio triggers)
  4. Light stand for flash and umbrella
  5. Second flash with triggering system
  6. Light stand for flash and umbrella
  7. Professional grade telephoto zoom (i.e 70-200mm)
  8. Professional grade wide angle zoom (i.e. 24-70mm)
  9. Wide angle prime lens (28mm or 35mm)
  10. Macro lens (85mm or 100mm)
  11. Full-frame dSLR body

You may want to sell the consumer zoom once you have professional grade ones, though it can be useful in situations where you need a wide range of focal lengths but can only bring one lens. If you never plan to get a full-frame dSLR, a professional grade wide angle zoom specific to crop sensor bodies might be a good idea.

Other options beyond this:

  • More flashes
  • Flash accessories (grids, snoots, softboxes, beauty dishes, gobos, etc)
  • Crazy nature lenses (i.e. 100-400mm)
  • Teleconverters (make any lens act like a longer one)
  • Fisheye lenses
  • A second body, so you can use two lenses without having to swap.

If you’ve worked your way through all of that, probably know a lot more about photography than I do. If you are in need of more distant horizons, there are two words to consider: medium format.